How to Use GoDiag GT100+ for ECM and PCM Programming
Matched product:

EU UK US SHIP GODIAG GT100+ GT100 Pro OBDII Breakout Box ECU Bench Connector Adds Electronic Current Display and CANBUS Protocol
- Item No. SO537-B
- Free Shipping
Compatible with tools from LAUNCH, AUTEL, FOXWELL, XHORSE, VXDIAG, CGDI.....
Supports OBDII 16PIN protocol communication detection and ECU maintenance, diagnosis, programming, coding
In the rapidly evolving field of automotive diagnostics and maintenance, precision tools like the GoDiag GT100+ are indispensable for professionals and enthusiasts alike. This device offers robust capabilities for testing and programming Engine Control Modules (ECM) and Powertrain Control Modules (PCM), providing a practical solution for complex vehicle diagnostics.
This article delves into the use of the GoDiag GT100+ with detailed insights from a tutorial video, highlighting its features, setup process, and operational guidelines.
Understanding the GoDiag GT100+
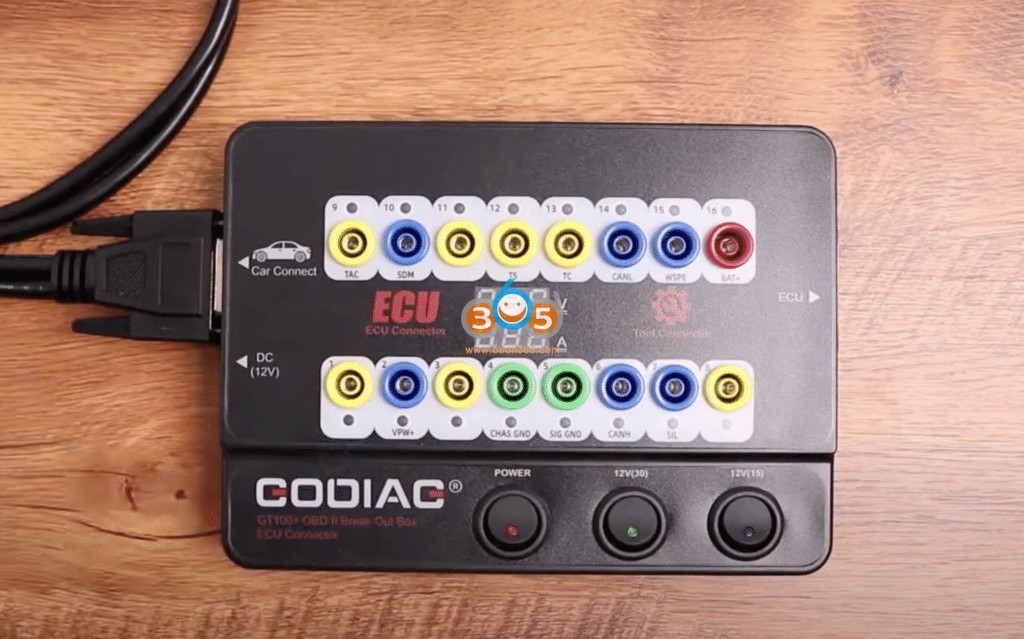
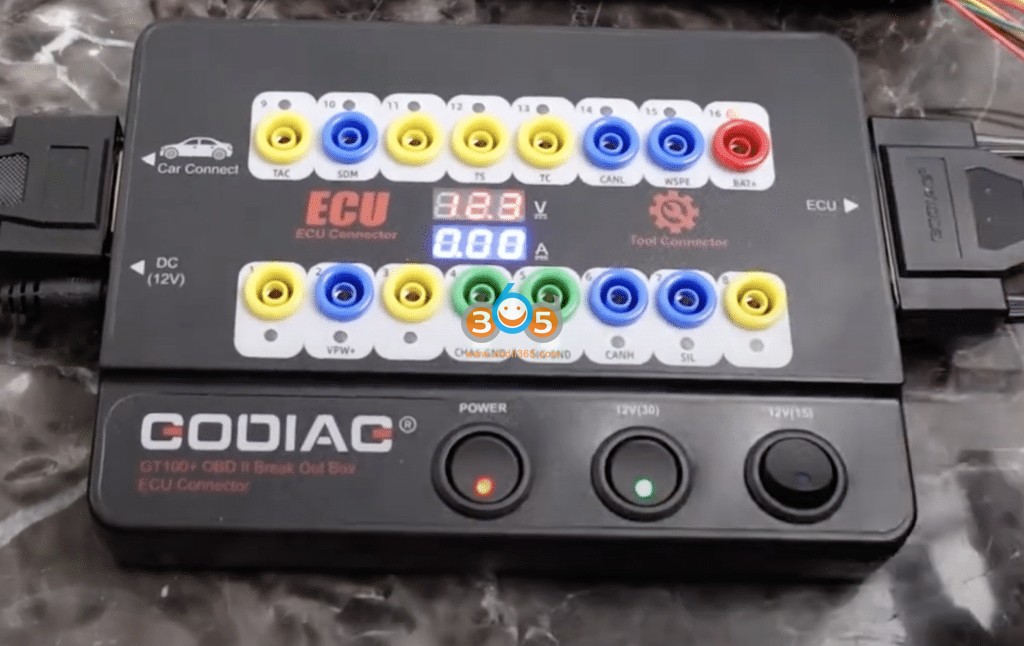
The GoDiag GT100+ is a diagnostic tool designed to facilitate the testing of automotive computers such as ECMs and PCMs, either while installed in the vehicle or as standalone units. Its design caters to the needs of both novice and professional mechanics by providing a straightforward interface coupled with comprehensive functionality.
Key Features
-
Versatility: Supports various car models and types by allowing connections to different ECM and PCM systems.
- Precision: Offers detailed pin connections for accurate diagnostics without harming the vehicle’s electronic system.
- Functionality: Includes features for both OBD2 diagnostics and more advanced programming tasks.
Setup and Preparation
Effective use of the GoDiag GT100+ begins with proper setup and preparation. The video tutorial emphasizes the importance of a clean and organized workspace to avoid errors and ensure safety during the diagnostic process.

Workspace Organization
-
Clarity and Accessibility: Keep only necessary tools and equipment within reach to streamline the workflow.
- Safety Measures: Arrange all components neatly to avoid any accidental short circuits or damage to delicate pins and connectors.
Connecting the GoDiag GT100+ to an ECM/PCM
The process of connecting the GoDiag GT100+ to a car’s computer system is critical. The tutorial uses a Dodge Neon SRT4’s ECM to demonstrate the connection procedure, but the principles apply broadly to other vehicles as well.
Connection Steps:
-
Identify the Pins: Use the service manual to locate the correct pins for power, ground, and data connections.
- Prepare the Wires: Sort and label the wires according to their functions—power, ground, data (CAN low, CAN high), and other necessary signals.
- Make the Connections: Carefully connect the wires to the corresponding pins, ensuring that the connections are secure and that no pins are bent or damaged.
Tips for Successful Connections
-
Handling Pins: Always connect and disconnect pins by applying force directly in line with the pin to prevent bending or breaking.
- Using the Correct Connectors: Select the appropriate size connectors for the pins to ensure a tight fit without forcing them.
Powering and Testing the ECM/PCM
Once the ECM or PCM is connected to the GoDiag GT100+, it’s time to power it up and begin testing.
Power Management
-
Using the GT100+ Power Switches: The GT100+ features switches that simulate various key positions in a vehicle, allowing users to test the ECM/PCM in different states (off, on, and run).
- Adjustable Power Supplies: For more delicate tasks or when programming is required, using an adjustable power supply can provide more control over the voltage and amperage, safeguarding the ECM/PCM from potential damage due to overcurrent.
Diagnostic Functions
-
Reading Diagnostic Trouble Codes (DTCs): Identify and troubleshoot errors within the vehicle’s systems.
- Monitoring Live Data: Observe real-time data from the vehicle’s sensors, which can be critical for diagnosing intermittent issues or verifying sensor operation.
- Programming and Reprogramming: Update or modify the software within the ECM/PCM to enhance vehicle performance or address manufacturer updates.
Advanced Troubleshooting with the GoDiag GT100+
For more complex diagnostics, the GoDiag GT100+ can be used in conjunction with additional tools such as oscilloscopes or multimeters. This capability is particularly useful for:
- Signal Integrity Tests: Check the quality and consistency of data signals from the ECM/PCM.
- Sensor Simulations: Simulate inputs from vehicle sensors to test the ECM/PCM’s response, crucial for vehicles that rely heavily on electronic inputs for operation.
Best Practices for Using the GoDiag GT100+
-
Regular Updates: Keep the firmware and software of the GoDiag GT100+ updated to ensure compatibility with new car models and technologies.
- Comprehensive Documentation: Maintain detailed records of all diagnostics and programming done with the tool to assist in future troubleshooting and maintenance.
The GoDiag GT100+ is a powerful tool that bridges the gap between basic OBD2 scanners and professional automotive diagnostic equipment. Its ability to perform detailed diagnostics and programming on ECMs and PCMs makes it an essential asset in any mechanic's toolkit. By following the detailed guidelines and tips provided in the tutorial, users can maximize the effectiveness of their diagnostic sessions and ensure the longevity and performance of the vehicles they service.
For further exploration of automotive diagnostic techniques and tools, stay tuned to future articles that will delve deeper into advanced diagnostics and vehicle electronics troubleshooting.